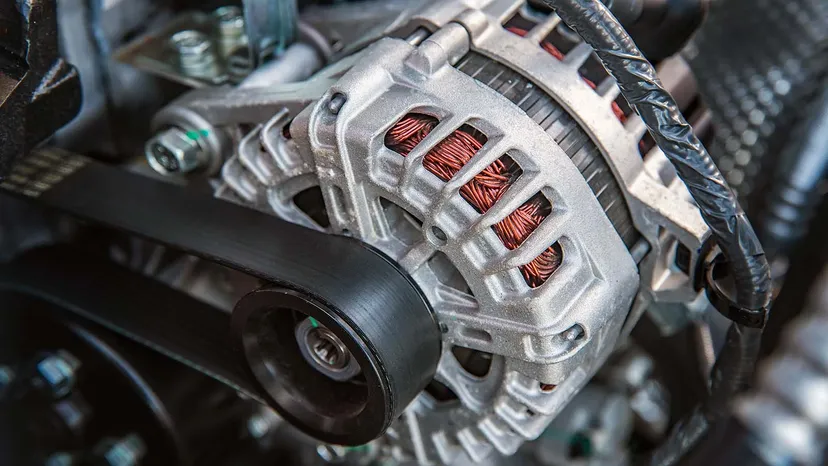
The alternator in your car is responsible for charging the battery and powering the electrical components while the engine is running. If the alternator fails, the battery will eventually lose its charge and various electrical systems in the vehicle may fail. Fortunately, testing your alternator at home is a relatively simple process that will help you determine if it is working properly. Below is a step-by-step guide on how to test your car’s alternator at home.
Preparing Your Vehicle for Inspection
Before testing your alternator, make sure your car is in a safe and stable environment. Park your car on a level surface and make sure the engine is turned off. If you are testing the alternator with the engine running, always make sure the car is in park or neutral and the parking brake is engaged.
Next, gather the necessary tools: a multimeter, a flashlight (if necessary), and a helper for some testing. Make sure your multimeter can measure DC voltage and current.
Check the battery voltage
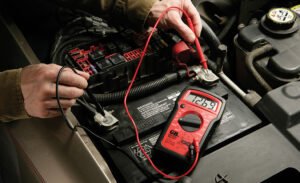
First, test the battery voltage. This will tell you if the alternator is charging the battery properly. Set your multimeter to measure DC voltage. Place the red (positive) lead of the multimeter on the positive terminal of the battery and the black (negative) lead on the negative terminal. With the engine off, a fully charged battery should read between 12.4 and 12.7 volts. If the voltage is much lower (for example, less than 12 volts), the battery may be weak or dead. This could indicate that the alternator is not charging properly.
Start the engine and measure the voltage again
Now that you have a baseline battery voltage, start the engine. As the engine is running, the alternator will begin charging the battery. Measure the battery voltage again with the multimeter while the engine is running. Place the red lead of the multimeter on the positive terminal of the battery and the black lead on the negative terminal. The voltage should now read between 13.7 and 14.7 volts. This range indicates that the alternator is working properly and charging the battery.
Perform a Load Test
To further evaluate the performance of your alternator, you can perform a load test. This test shows how the alternator behaves when the electrical system is under load, such as when the headlights, air conditioning, or other electrical components are turned on. With the engine running, turn on the electrical accessories, such as the headlights, radio, air conditioning, and any other electrical components. Look at the multimeter reading. If the voltage drops significantly (below 13 volts), the alternator is having difficulty maintaining a charge under load. This is a sign that the alternator is failing.
Listen for Unusual Noises
Another way to check the health of your alternator is to listen for unusual noises when the engine is running. A failing alternator may produce grinding, whining, or squealing noises due to worn bearings or internal damage. If you hear strange noises coming from the alternator, it may need to be inspected or replaced.
Check for Flashing Lights
If your car’s headlights or dashboard lights are flashing while you’re driving, it could be a sign that the alternator isn’t producing enough power. A flashing light can come on if the alternator isn’t charging the battery properly, or if there’s a loose connection or faulty wiring. If you see a flashing light, it’s a good idea to have your alternator and electrical system checked further.
Check the Alternator Belt
Stop the engine, open the hood, and visually inspect the alternator belt. It should be tight and free of cracks or wear. If the belt is loose, damaged, or slipping, it may need to be adjusted or replaced. A faulty belt can prevent the alternator from producing enough electricity.
Check the Alternator Warning Light
Most vehicles have an alternator warning light on the dashboard. This light will come on if there’s a problem with the alternator. If the alternator indicator light comes on while you’re driving, it means the alternator isn’t working properly. While this indicator light is not a definitive test, it can serve as a warning that further investigation is needed.
Using an Alternator Tester (Optional)
For a more accurate test, you can use an alternator tester, which is available at many auto stores or online. This tool connects directly to the alternator and measures its performance more accurately. It provides a detailed look at the alternator’s output, including whether it is charging the battery properly and delivering the correct voltage under load.
Seek Professional Assistance If Needed
If the tests indicate that the alternator is not working properly, it may be time to replace the alternator. Identify the exact source of the problem. If your alternator is failing, it is often cheaper to replace it with a new or remanufactured generator than to attempt to repair it yourself.
Finally
Testing your car’s alternator at home is a simple process that can help you diagnose potential electrical problems early on. You can determine if the alternator is functioning properly by checking voltage levels with a multimeter, performing a load test, and listening for unusual noises. If you discover any problems, you can prevent further damage to your vehicle’s electrical system and battery by addressing them early. If you are unsure whether the problem persists, always take the appropriate precautions and seek professional help.