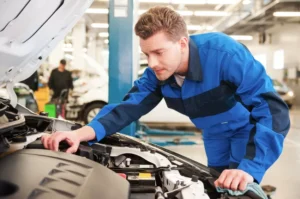
Owning a car comes with the responsibility of keeping it in top shape. But did you know that performing regular engine maintenance can save you time, money, and headaches down the road? DIY car engine maintenance is not just for seasoned mechanics; it’s something that anyone can do with a bit of guidance and the right tools.
Imagine cruising down the highway, confident that your vehicle is running smoothly because you’ve taken matters into your own hands. This step-by-step guide will empower you to tackle essential tasks like checking fluid levels or changing oil—all while gaining a deeper understanding of how your engine works. Whether you’re looking to boost performance or simply prolong your car’s lifespan, rolling up those sleeves and diving into some DIY work could be one of the best decisions you’ll make as a car owner!
Necessary Tools and Safety Precautions
Before diving into DIY car engine maintenance, it’s crucial to gather the right tools. A basic toolkit should include a socket set, wrenches, pliers, and screwdrivers. Don’t forget an oil catch pan for those messy jobs.
Safety is paramount when working on your vehicle. Always wear gloves to protect your hands from grime and chemicals. Safety goggles are essential too; they shield your eyes from debris or splashes while you’re tinkering under the hood.
Make sure you work in a well-ventilated area. Fumes can build up quickly, especially when changing fluids or dealing with fuel systems.
Also, ensure you have a fire extinguisher nearby just in case anything goes awry during maintenance tasks involving flammable materials.
Taking these precautions will help create a safe environment as you embark on this rewarding journey of caring for your car’s engine yourself.
Step 1: Checking the Fluid Levels
Checking fluid levels is a crucial first step in maintaining your engine. Regular inspections can prevent larger issues down the road.
Start with the oil dipstick. Pull it out, wipe it clean, and insert it back into its tube before removing it again to check the level. Ensure it’s within the recommended range marked on the dipstick.
Next up are other essential fluids: coolant, brake fluid, transmission fluid, and power steering fluid. Each reservoir usually has clear markings for optimal levels. If any of them appear low, top them off using the correct type specified in your owner’s manual.
Don’t forget windshield washer fluid! Keeping this topped off ensures visibility during rainy weather or after those pesky bug splatters.
Taking just a few minutes to check these levels can save you time and money by catching potential problems early on.
Step 2: Changing the Oil and Oil Filter
Changing your car’s oil and oil filter is crucial for engine health. Start by gathering the necessary supplies: fresh oil, a new filter, an oil catch pan, and a wrench.
Park your vehicle on level ground. Allow the engine to cool down before you begin. This step ensures safety while working with hot components.
Next, locate the drain plug beneath the engine. Place your catch pan underneath it and remove the plug cautiously—oil will flow out quickly.
Once drained completely, replace the drain plug securely. Now it’s time to swap out that old oil filter for a new one; use an appropriate wrench to loosen it.
Pour in fresh oil through the filler cap using a funnel for precision. Always check your owner’s manual for specific quantities and types of oil needed for optimal performance.
After adding the new oil, run your engine briefly to circulate everything properly before checking levels again.
Step 3: Replacing the Spark Plugs
Replacing spark plugs is a vital step in maintaining your engine’s performance. These small components play a crucial role in igniting the air-fuel mixture within the cylinders.
Start by locating the spark plugs, usually found at the top of the engine. Disconnecting each plug wire carefully prevents any damage. Remember to label them if needed for easier reassembly.
Using a socket wrench, unscrew and remove old spark plugs one at a time. Inspect their condition; worn or fouled plugs can significantly affect efficiency and power.
Before installing new ones, check the gap with a feeler gauge to ensure optimal performance. Carefully thread in each new plug by hand first to avoid cross-threading.
Reconnect the wires securely, ensuring they snap into place properly. This simple task can lead to smoother starts and better fuel economy down the line.
Step 4: Cleaning or Replacing the Air Filter
The air filter plays a crucial role in your engine’s performance. It ensures that clean air flows into the combustion chamber, promoting efficient fuel burning.
Start by locating the air filter housing—usually on top of or beside the engine. Open it carefully to avoid any debris falling inside. Remove the filter and inspect its condition; if it’s dirty or clogged with dirt and dust, it’s time for a cleaning or replacement.
If you’re cleaning, gently tap it against a hard surface to dislodge loose particles. For more stubborn grime, use compressed air from an outer edge towards the center. If you opt for replacement, ensure you have the right size and type compatible with your vehicle model.
After servicing, secure everything back in place tightly. A well-maintained air filter can improve gas mileage and overall engine efficiency significantly.
Step 5: Inspecting and Replacing Belts and Hoses
Belts and hoses play a vital role in the smooth operation of your car’s engine. They endure constant wear and tear, which can lead to leaks or breakage.
Start by visually inspecting each belt for cracks, fraying, or signs of glazing. Gently press on them; they should feel firm but not overly tight. If you notice any issues, it’s time for a replacement.
Next, examine the hoses attached to various components like the radiator and water pump. Look for bulges, leaks, or hardened sections that could signal impending failure. A soft squeeze will help determine their condition—if they feel spongy or brittle, consider changing them out.
When replacing belts and hoses, always refer to your vehicle’s manual for specific instructions regarding sizes and installation procedures. Using OEM parts is recommended for optimal performance and longevity. Regular checks can save you from costly repairs down the road.
Step 6: Checking and Topping off Coolant Levels
Maintaining your car’s coolant levels is crucial for preventing overheating and ensuring optimal engine performance. Start by locating the coolant reservoir, which is usually a translucent tank near the radiator. Check the fluid level against the markings on the side.
If it’s below the recommended level, it’s time to top off with a mixture of coolant and water—typically a 50/50 ratio works best. Be cautious when dealing with hot engines; always allow it to cool down before opening any caps to avoid burns or injuries.
After topping off, check for any leaks around hoses and connections. These can lead to significant issues if not addressed promptly. Regular checks will help maintain proper temperature regulation within your engine, contributing significantly to its longevity.
Performing these maintenance steps ensures that your vehicle runs smoothly and efficiently for years to come. Taking charge of DIY car engine maintenance not only saves you money but enhances your understanding of how your vehicle operates. With each step completed, you build confidence in handling future repairs or upgrades yourself!