Owning a car can be a liberating experience—no waiting for public transportation, no paying exorbitant rideshare fees. But with ownership comes responsibility, and regular car maintenance is key to keeping your vehicle running smoothly and saving you a fortune on costly repairs down the line.
If you’ve been relying solely on mechanics for upkeep, you’ll be surprised to know that many routine maintenance tasks can be done from the comfort of your own garage. Not only does this save money, but it also gives you a deeper understanding of how your car works. Whether you’re a seasoned DIY enthusiast or just starting out, this guide will walk you through essential car maintenance tasks that are simple, cost-effective, and rewarding.
Essential Tools and Safety Precautions
Before rolling up your sleeves, you’ll need the right tools and a basic understanding of safety precautions.
Basic Tools You’ll Need
To get started with most car maintenance tasks, ensure you have the following essentials:
- Socket set and wrenches
- Screwdrivers (both flathead and Phillips)
- Lubricants and rags
- Tire pressure gauge
- Car jack and safety stands
- Funnel and oil filter wrench
- Battery terminal cleaner
- Torque wrench
Safety First!
Working on a car is rewarding, but safety is paramount. Follow these safety tips:
- Always park your car on a flat surface and use wheel chocks to prevent rolling.
- Use jack stands, never just the car jack, to support your vehicle during work.
- Wear gloves to protect your hands and safety goggles to guard your eyes.
- Disconnect the battery when working on electrical components.
- Follow the car owner’s manual for specific guidelines and specifications.
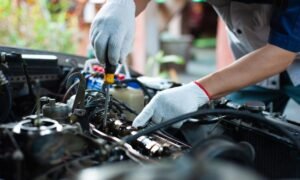
Oil Change – A Step-by-Step Guide
Why Oil Changes Matter
Engine oil is your car’s lifeblood. It keeps engine parts lubricated, reduces friction, and prevents overheating. Changing your oil regularly—about every 5,000-7,500 miles for most vehicles—is critical to avoiding engine damage.
How to Change Your Oil
- Gather Materials
You’ll need engine oil (consult your car manual for the type and quantity), a new oil filter, an oil filter wrench, a funnel, and a drain pan.
- Drain Old Oil
Raise your car using a jack and place jack stands underneath. Remove the oil cap from the engine, position the drain pan under the oil drain plug, and unscrew the plug to release the old oil.
- Replace the Oil Filter
Use an oil filter wrench to remove the old filter. Before installing the new one, rub a small amount of fresh oil onto its seal.
- Add Fresh Oil
Replace the drain plug securely, then use a funnel to pour fresh oil into the engine. Finally, check the oil level with the dipstick.
- Recycle Your Oil
Never dispose of used oil improperly. Collect it in a sealed container and drop it off at a recycling center or auto shop.
Pro Tip
Keep a record of your oil changes. Tracking maintenance ensures you stick to recommended intervals.
Checking and Replacing Air Filters
Why Air Filters Are Crucial
A clean air filter improves fuel efficiency and keeps your engine healthy by allowing it to “breathe.” Experts recommend checking your air filter every 12,000–15,000 miles.
Steps to Replace an Air Filter
- Open the hood and locate the air filter housing (usually a rectangular or cylindrical box).
- Unsnap or unscrew the cover to access the filter.
- Remove the old filter and hold it up to the light—if light can’t pass through, it’s time for a replacement.
- Insert the new filter and secure the housing cover.
It’s that simple, and it can dramatically improve your car’s performance!
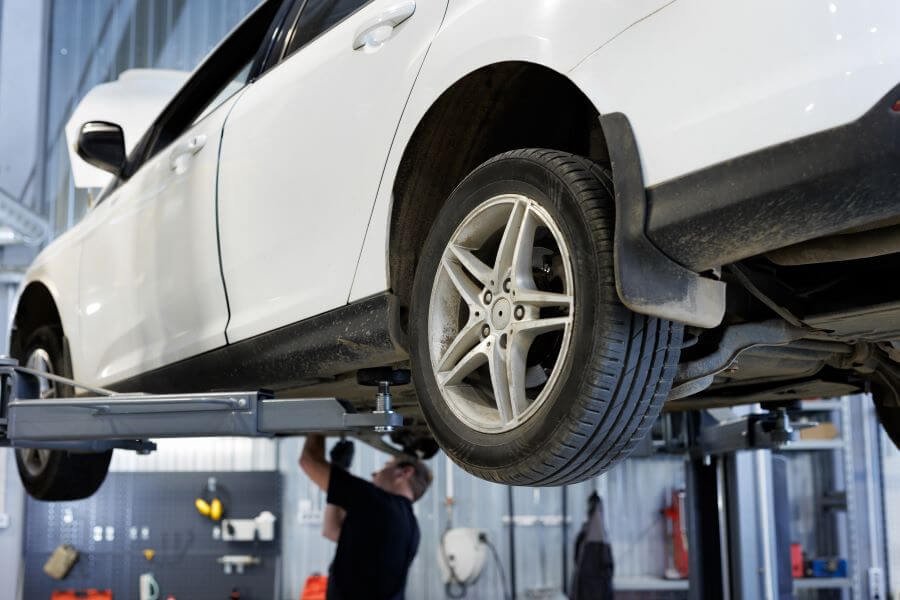
Tire Maintenance for Safety and Savings
Check Tire Pressure
Use a tire pressure gauge to ensure all tires are inflated to the manufacturer-recommended PSI (you can find this on the driver-side door frame or in your manual). Underinflated tires wear out faster and reduce fuel efficiency!
Inspect Tread Wear
Check if the tread is worn by inserting a penny into the grooves with Lincoln’s head down—if you can see all of the head, it’s time for new tires.
Rotate Your Tires
Tire rotation ensures even wear, extending the life of your tires:
- Lift your car using a jack and place jack stands beneath.
- Swap the rear tires to the front and vice-versa, switching sides (e.g., left rear to right front) unless otherwise specified by your car’s manual.
Doing this every 6,000-8,000 miles is a small effort with big savings down the road.
Battery Care to Prevent Unexpected Failures
Signs of a Weak Battery
Slow engine cranks or dimming lights may indicate your battery is struggling. Test it with a multimeter; a reading below 12.4 volts means it’s not fully charged.
Battery Maintenance Steps
- Clean Terminals
Disconnect the battery (negative terminal first), and use a battery terminal cleaner or baking soda mixture to scrub away corrosion.
- Check Connections
Ensure cables are tight and terminals are secure.
If your battery is performing inconsistently, it may be time to replace it.
Brake Inspection and Maintenance
Recognize the Warning Signs
Squeaking or grinding noises, a spongy brake pedal, or vibrations during braking indicate it’s time to inspect your brakes.
How to Inspect Brake Pads and Rotors
- Remove the wheels to access the brakes.
- Examine the brake pads—if they’re less than a quarter-inch thick, they need replacing.
- Check the rotors for grooves or warping.
For brake pad replacement, use your car’s manual for guidance, or consult a professional for more complex repairs.
Reap the Benefits of DIY Maintenance
When you take control of your car’s maintenance, it’s not just about saving money—it’s about empowerment and extending the life of your vehicle. By performing essential DIY tasks like oil changes, air filter swaps, and tire care, you’ll reduce the chances of major, costly breakdowns while gaining confidence in your mechanical skills.
Do you feel ready to get started, or do you have more questions? Share your thoughts in the comments below or reach out for further tips! Together, we can keep your car running at its very best.