Diagnosing electrical problems in your car can seem daunting, but with the right approach and tools, you can identify and fix many issues yourself. Your car’s electrical system powers important components like lights, ignition, battery, alternator, and more. If one part of this system fails, it can cause a variety of issues, from dead batteries to faulty electrical components. Below is a step-by-step guide to diagnosing electrical problems in your car.
Step 1: Identify the Symptoms
Before you begin diagnosing the problem, it’s important to understand the symptoms you’re experiencing. Is your car not starting or are certain components, like lights, radio, or power windows, not working properly? Make a note of any abnormalities or issues you notice. This will help you with the diagnostic process. Common electrical symptoms include dim headlights, flickering dashboard lights, a dead battery, and ignition problems.
Step 2: Check the Battery
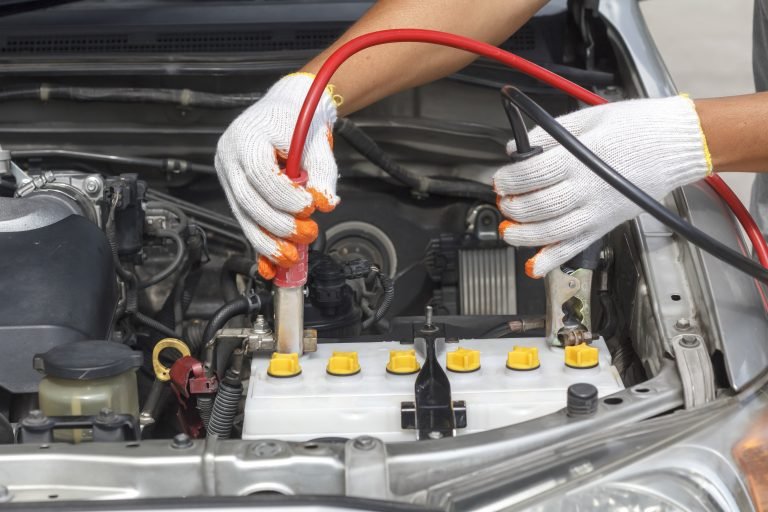
Denial or low batteries are often the cause of many electrical problems. First, check the battery itself. Look for corrosion around the battery terminals. This can prevent the car from starting or cause other electrical problems. If there is corrosion, gently clean the terminals with a wire brush and a mixture of baking soda and water. Try to start the car after cleaning the terminals. If the car still won’t start, you may need to test the battery voltage with a multimeter.
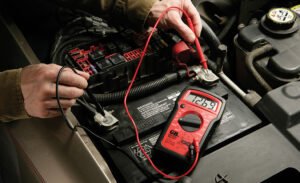
To check the battery voltage, set your multimeter to 20 volts DC and touch the red wire to the positive terminal and the black wire to the negative terminal. A healthy battery should read between 12.6 and 12.8 volts when the car is turned off. When the car is running, the voltage should read between 13.5 and 14.5 volts. If the voltage is below this range, the battery may need to be recharged or replaced.
Step 3: Check the Alternator
If your battery is in good condition but you are still experiencing electrical problems, the problem may be with the alternator. The alternator is responsible for charging the battery and powering the electrical components when the engine is running. If the alternator fails, the battery will not be charged and the electrical system will malfunction.
To test the alternator, start the car and use a multimeter to measure the voltage across the battery terminals. A properly functioning alternator should produce between 13.5 and 14.5 volts. If the voltage is below this range, the alternator may not be charging the battery properly and should be replaced. If you notice your headlights flickering or the battery warning light on your dashboard comes on, this could indicate a bad alternator.
Step 4: Check the Fuse
Blown fuses are a common cause of electrical problems in your car. When the current is too high, the fuse breaks the circuit, protecting the electrical components. If you are having problems with a specific electrical component, such as a broken radio, power windows, or headlights, check the associated fuses.
Locate your car’s fuse box. This is usually located under the dashboard or in the engine compartment. Fuses usually indicate which component they control. Check the fuses and see if any are blown. A blown fuse will have broken or melted metal strips inside. Replace the fuse with a new one of the same amperage and see if the problem goes away.
Step 5: Check Wiring and Connections
Damaged or worn wiring is another common cause of electrical problems in cars. Over time, wiring can be exposed to heat, moisture, or physical wear and tear, causing shorts or open circuits. Check the wiring around the battery, under the dashboard, and in the engine compartment for signs of wear or damage. If you find any exposed wires or frayed or broken connections, repair or replace them.
To repair damaged wires, use a wire stripper to remove the damaged section and strip the insulation from the wire. Next, you can reconnect the wires with electrical tape or solder the wires together for a more secure connection. Be sure to cover any exposed wires with electrical tape to prevent future damage.
Step 6: Test the Electrical Components
After you’ve checked the battery, alternator, fuses, and wiring, it’s time to test the faulty electrical components. If the problem is with a specific component, such as the headlights, power windows, or radio, test each component separately.
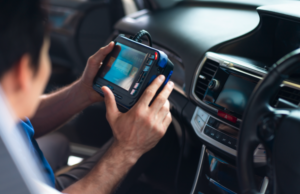
Tools such as an OBD-II scanner, which reads trouble codes from your car’s computer system. If you suspect a problem with the relay or sensor, it’s best to consult a professional mechanic for further diagnosis.
Step 7: Advanced Diagnostics Using a Multimeter
If you still can’t figure out the problem, a multimeter can be a valuable tool for advanced diagnostics. A multimeter can measure voltage, current, and resistance. This can help you find problems with wires, fuses, alternators, and other electrical components.
To test continuity, set the multimeter to the lowest resistance setting and touch the test leads to both ends of the circuit or component you’re testing. If the multimeter reads no resistance or reads a very high value, the circuit is open. If the reading is low, the circuit is intact and functioning properly.
Step 8: Consult a Professional Mechanic
If you have followed the steps above and still cannot resolve the issue, it is best to consult a professional mechanic. Electrical issues can sometimes be complex and require specialised knowledge and tools to diagnose and repair. A mechanic can thoroughly diagnose and repair any serious electrical issues so that your car is functioning optimally again.
Finally
Diagnosing electrical issues in a car requires a systematic approach. You start by checking simple issues, such as the battery and fuses, and then move on to more complex issues, such as the alternator, wiring, and components. By following these steps and using the right tools, you can often identify and resolve common electrical issues in your home. However, if the issue is difficult to diagnose or resolve, it is always a good idea to seek professional help to ensure that your car’s electrical system is functioning properly.