Brake pads are critical for your car’s safety, gripping rotors to slow or stop your vehicle. Replacing them at home is a rewarding intermediate DIY task that saves money and ensures reliable braking. This guide is for car owners with basic mechanical skills, explaining why brake pad replacement matters, how to do it safely, and what to watch for. With detailed steps, safety precautions, and practical tips, you’ll gain the confidence to maintain your brakes and keep safety first.
Why Brake Pad Replacement Matters
Brake pads wear down over time, typically lasting 30,000–70,000 miles, depending on driving habits, vehicle weight, and pad material. Worn pads reduce stopping power, increase braking distances, and can damage rotors ($200–$600 per axle to replace), per automotive repair estimates. Squealing, grinding, or a spongy pedal signal the need for replacement, and ignoring them risks brake failure—a factor in thousands of crashes yearly, according to the National Highway Traffic Safety Administration (NHTSA).
Replacing brake pads every 2–4 years or when thickness drops below 3mm (1/8 inch) maintains safety and performance. The job costs $20–$100 for parts and takes 1–2 hours per axle, saving $150–$400 versus a shop’s labor. While more complex than checking fluids, it’s achievable with standard tools and care, making it a great step for DIYers ready to tackle brakes. By replacing pads yourself, you’ll save money, learn your car’s systems, and drive with peace of mind.
Tools and Materials Needed
You’ll need the following to replace brake pads:
- For Removal and Installation:
- Jack (floor jack preferred, $30–$100)
- Jack stands (pair, $20–$50)
- Lug wrench or impact wrench (to remove wheels)
- Socket set (e.g., 13mm–17mm for caliper bolts)
- Ratchet wrench (3/8-inch drive)
- C-clamp or brake caliper tool ($10–$30, to compress pistons)
- Replacement brake pads (correct type for your vehicle, e.g., ceramic, semi-metallic)
- Brake grease (synthetic, $5–$10, for caliper pins and pad backs)
- For Inspection and Cleaning:
- Wire brush (to clean caliper brackets)
- Brake cleaner spray ($5–$10, to remove dust and grease)
- Clean rags or paper towels
- Gloves (nitrile to protect hands)
- Safety glasses (to shield eyes from dust or fluid)
- Optional:
- Torque wrench ($20–$50, for precise bolt/lug tightening)
- Anti-squeal shims or adhesive ($5–$10, if not included with pads)
- Bungee cord or hanger (to support caliper during work)
- Flashlight (for visibility in wheel wells)
- Notebook (to log mileage and pad types)
- Wheel chocks ($10–$20, for extra safety)
To choose the right pads, check your owner’s manual or an auto parts store’s fitment guide. For example, a 2020 Toyota Corolla might use Bosch QuietCast ceramic pads, while a 2018 Ford F-150 could need Wagner ThermoQuiet semi-metallic pads. Confirm front or rear axle fitment, as they differ. Avoid cheap pads, as quality brands (e.g., Akebono, Brembo) ensure durability and quiet braking.
Safety First: Working on Brakes
Brake pad replacement involves lifting the car and handling critical safety components. Follow these precautions:
- Park Safely: Work on a flat, level surface with the parking brake engaged (for front brakes) or released (for rear, to avoid binding).
- Use Proper Lifting Gear: Never work under a car supported only by a jack—use jack stands rated for your vehicle’s weight.
- Wear Protective Gear: Gloves and safety glasses guard against brake dust (potentially hazardous) and fluid splashes.
- Turn Off the Engine: Remove keys to prevent movement or electrical issues.
- Work When Cool: Wait 30–60 minutes after driving, as rotors can exceed 300°F.
- Avoid Damaging Calipers: Don’t let calipers hang by brake lines, which can tear hoses ($50–$200 to replace).
- Check Brake Fluid: Open the reservoir cap during piston compression to prevent pressure buildup, but avoid spills (fluid strips paint).
- Handle Dust Safely: Brake dust may contain asbestos-like particles (older cars); use brake cleaner, not compressed air, to avoid inhalation.
If you’re new to brake work, start with front pads (often easier) and watch a model-specific video (e.g., “2021 Honda Civic brake pad replacement”). Work on one wheel at a time to use the other as a reference.
Step 1: Preparing to Replace Brake Pads
Proper setup makes the job smoother. Here’s how to begin:
- Verify Replacement Need:
- Check mileage (e.g., pads due at 50,000 miles per manual).
- Listen for squealing (wear indicators) or grinding (metal-on-rotor, urgent).
- Feel for pedal vibration, longer stops, or pulling to one side.
- Inspect pads through wheel spokes if visible—less than 3mm thickness means replace.
- Gather Parts and Tools:
- Buy pads for the correct axle (front/rear, typically $20–$50 per pair of wheels).
- Consider rotors if they’re scored or thin (optional, $50–$150 per axle, but adds time).
- Ensure tools match your car’s caliper bolts (e.g., 14mm for Toyotas, 17mm for Fords).
- Prepare the Car:
- Park on a flat surface and place wheel chocks behind/against tires not being lifted.
- Loosen lug nuts on both wheels of one axle (e.g., both front wheels) with a lug wrench, but don’t remove yet.
- Open the hood and locate the brake fluid reservoir (near the firewall). Remove the cap to allow fluid displacement, placing a rag around it to catch spills.
- Lift the Car:
- Jack up one side using your manual’s jacking point (e.g., frame rail behind front wheel).
- Place a jack stand under a reinforced area (e.g., pinch weld), lower the car onto it, and repeat for the other side.
- Double-check stands are secure before working.
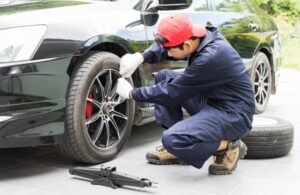
- Remove wheels by unscrewing lug nuts fully and pulling wheels off.
Pro Tip: Lay out tools and parts in order of use, and keep a phone handy to photograph caliper or rotor setups for reassembly reference.
Step 2: Removing Old Brake Pads
Work carefully to avoid damaging components:
- Access the Caliper:
- Locate the brake caliper (metal clamp over the rotor, holding pads).
- Inspect for leaks or torn boots on the piston or pins (replace if damaged, $100–$300).
- Remove the Caliper:
- Find the caliper bolts (usually 2, on the back, e.g., 14mm hex or Torx).
- Use a socket and ratchet to loosen and remove bolts, turning counterclockwise.
- Slide the caliper off the rotor. If stuck, wiggle gently or tap with a rubber mallet.
- Hang the caliper on a bungee cord or wire hanger hooked to the suspension (e.g., coil spring) to avoid stressing the brake hose.
- Remove Old Pads:
- Pull the pads out of the caliper bracket (they may clip or slide out).
- Note their orientation (inner vs. outer pad, wear indicators facing rotor).
- Inspect pad thickness:
- Normal Wear: Even thinning, 1–2mm left.
- Uneven Wear: Suggests stuck caliper pins or misalignment ($50–$200 to fix).
- Check for shims (metal clips); remove and reuse if intact or replace with new pads’ shims.
- Inspect the Rotor:
- Look for:
- Scoring: Deep grooves (resurface or replace, $20–$100 per rotor).
- Warping: Pulsing pedal suggests warpage (replace rotors).
- Rust: Light surface rust is normal; heavy pitting needs attention.
- Measure thickness with a micrometer if possible (compare to manual’s minimum, e.g., 22mm for a 2020 Jeep Cherokee).
- Clean with brake cleaner and a rag to remove dust.
- Look for:
- Clean the Caliper Bracket:
- Remove the bracket (if needed, 2 bolts, e.g., 17mm) for better access.
- Use a wire brush to clean rust or debris from pad slots and clips.
- Spray with brake cleaner, wipe dry, and ensure clips move freely.
Note: If pads are worn to metal, rotors are likely damaged—replace them to avoid premature new pad wear ($100–$300 extra).
Step 3: Installing New Brake Pads
Install carefully for safe braking:
- Prepare New Pads:
- Compare new pads to old ones for fit (shape, clips, thickness).
- Apply brake grease to the back of pads (where they touch pistons/clips) and shims to prevent squealing. Avoid getting grease on friction surfaces.
- Attach shims or wear indicators per instructions (usually clip-on).
- Compress the Caliper Piston:
- Place the old pad (or a block of wood) against the piston (circular part in caliper).
- Use a C-clamp or caliper tool to slowly compress the piston back into the caliper, opening space for thicker new pads.
- Watch the brake fluid reservoir—fluid may rise. Siphon excess with a clean syringe if nearing overflow (dispose properly).
- For rear brakes with integrated parking brakes, you may need to rotate the piston (special tool, $10–$20) clockwise while compressing—check your manual.
- Install New Pads:
- Slide or clip pads into the caliper bracket, ensuring wear indicators (if present) face the rotor’s rotation (usually inward).
- Verify pads sit flush and move slightly (not stuck).
- Reassemble the Caliper:
- Apply brake grease to caliper pins (slide bolts, if removable) for smooth movement.
- Slide the caliper over the pads and rotor, aligning bolt holes.
- Hand-thread bolts to avoid cross-threading, then tighten with a ratchet (torque to spec, e.g., 25–35 ft-lbs, or snug plus 1/4 turn if no torque wrench).
- Repeat for the Other Side:
- Replace pads on the opposite wheel of the same axle to ensure even braking.
- Keep the first side assembled as a reference if needed.
Step 4: Final Assembly and Testing
Finish and verify your work:
- Reinstall Wheels:
- Mount wheels, hand-tighten lug nuts in a star pattern to seat evenly.
- Lower the car off jack stands, then torque lugs (e.g., 80–100 ft-lbs for most cars, check manual).
- Check Brake Fluid:
- Top up the reservoir to the “Max” line with the correct fluid (e.g., DOT 3 for a 2022 Nissan Altima) if low after compression.
- Replace the cap tightly.
- Bed the Pads:
- Start the car and pump the brake pedal 10–15 times (engine off) until firm.
- Drive at 5–10 mph, braking gently 5–10 times to seat pads.
- Then, at 30–40 mph, brake moderately 3–5 times, cooling between stops (drive 1–2 minutes).
- Avoid hard stops for 100–200 miles to prevent glazing.
- Test Drive:
- Drive 5–10 miles, checking for:
- Firm pedal (no sponginess).
- Even stopping (no pulling).
- No grinding or squealing (slight noise is normal for new pads).
- If issues arise, recheck bolts, pads, or fluid.
- Drive 5–10 miles, checking for:
- Dispose of Waste:
- Recycle old pads at auto stores (some contain metal) or scrap yards.
- Take used brake fluid or cleaner-soaked rags to a recycling center—never trash them, as they’re hazardous.
Pro Tip: Save one old pad to compare wear later, and note the new pads’ part number for future buys.
Common Mistakes to Avoid
- Uneven Replacement: Always do both wheels on an axle to avoid uneven braking.
- Forcing Pistons: Rough compression damages seals ($100–$300).
- Grease on Friction Surfaces: Contaminated pads reduce grip—replace if soiled ($20–$50).
- Loose Bolts: Under-tightened calipers rattle or seize ($50–$200).
- Skipping Bedding: Unbedded pads squeal or wear fast.
- Ignoring Rotors: Damaged rotors ruin new pads quickly ($100–$300).
When to Seek Professional Help
Most pad replacements are DIY-friendly, but see a mechanic if:
- Damaged Calipers: Leaking or stuck pistons need rebuilding ($100–$500).
- Worn Rotors: If too thin or warped, replace ($200–$600 per axle).
- ABS Issues: Warning lights or odd pedal feel suggest sensor or module faults ($200–$1,000).
- Complex Systems: Some cars (e.g., BMWs with electronic brakes) need special tools ($150–$400 labor).
- Grinding Persists: Post-replacement noise may mean deeper issues ($100–$800).
Shops charge $150–$500 per axle, but DIY saves money and builds brake expertise.
Additional Tips for Brake Pad Success
- Inspect Calipers: Check pins and boots for wear while pads are off ($20–$100 to replace).
- Time with Rotors: Replace or resurface rotors every 2–3 pad changes for best performance.
- Learn Symptoms: Squealing, pulsating, or soft pedals mean act fast.
- Keep Spares: Store extra pads ($20–$50) for quick future swaps.
- Upgrade Wisely: Ceramic pads are quieter but pricier ($40–$100); stick to OEM specs unless racing.
- Track Wear: Log replacements (e.g., “Akebono pads, front, 65,000 miles”) to predict timing.
Environmental and Cost Benefits
New pads maintain braking efficiency, cutting crash risks and emissions from roadside delays (20–50 pounds CO2 yearly, per EPA). Avoiding rotor damage saves metal waste, and DIY cuts $150–$400 per job. Buy pads in bulk (e.g., eBay, $30–$80 per axle) and recycle old pads/fluid at AutoZone to reduce landfill impact and sometimes earn $5–$10.
Conclusion
Changing your car’s brake pads is a practical DIY task that ensures safety and saves money. By following these steps—lifting safely, replacing pads, and bedding properly—you’ll restore braking power with confidence. This guide suits DIYers ready for intermediate work, while tips like inspecting calipers or logging wear help all drivers.
Next, try tasks like replacing spark plugs or cabin filters to grow your skills (see prior articles). If brakes feel off or damage is severe, consult a mechanic. With a jack and an hour, you’re set for safer, smoother stops.


